Tampilkan postingan dengan label Hardware Komputer. Tampilkan semua postingan

How to Back Up Data on a Laptop

Backing up your data and important files is a crucial part of computer maintenance, especially on laptops as they are more prone to damage or theft than desktops. Windows 7's built-in tool, called Backup and Restore, can automatically manage regular backups for you, saving your data to an external source such as an external hard drive, network location or even a blank DVD. For scheduled auto-backups, use the Task Scheduler to set reminders for yourself to connect an external backup source.

 Instructions Setting Up Backups 

 1 Click "Start | Control Panel | System and Maintenance | Backup and Restore."  

2 Click "Set up backup" to begin your backup configuration. Windows may take a minute or two to analyze your available backup locations.  

3 Choose where you want to save your backup data. While you can use your optical drive, a DVD doesn't have enough space to back the system image that allows you to restore your existing system settings. You can also use an external hard drive, network-attached storage or a flash drive with sufficient space -- if you're backing up large files or using your system image, you'll want at least 10GB. If you're only backing up small files, such as text documents, you can probably get away with just a few gigabytes.  

4 Select whether you want Windows to choose what directories are backed up, or whether you'd rather pick and choose. A custom setup allows you to remove resource-heavy folders if your backup location is short on space, as well as disable the system image, if necessary, for space issues. Click "Next" when done.

 5 Click "Change Schedule" and select a time and frequency that works best for your needs. Select a time when you know the computer will be on; if you leave your computer on overnight, for convenience, choose a time during the night when you won't be using it.

 6 Click "Save Settings and Run Backup," then "Back Up Now" to start your first backup and save your backup options. Backing up can take several minutes or up to an hour, depending on what you're backing up. Once completed, you can remove your external source. Using Task Scheduler for Reminders

 7 Click "Start | Control Panel | System and Security | Administrative Tools," then choose the "Task Scheduler" tool.  

8 Select "Create Basic Task" in the Actions pane on the right side of the screen.

 9 Enter a name and description for your task, click "Next" and select the trigger for your task at the same frequency as your backups. If you're running a monthly backup, for example, set a monthly reminder prior to the backup time. Click "Next," then choose the time and day for your alert.  

10 Select "Display a Message" or "Send an Email," depending on whether you want to receive an email or have a popup message reminding you to connect an external drive or disc.

 11 Enter the settings for your message -- either the mail settings or the contents of your displayed message.  

12 Review your task and click "Finish" to finalize.  

Tips & Warnings
You can also use cloud-based backup services, such as Carbonite and Mozy, which have programs that run in the background and back up files on a schedule. Unlike Backup and Restore, these do not back up system settings. If for whatever reason you need to turn off your backup, click "Turn off Schedule" on the backup page. When needed, use the Backup and Restore utility to restore your files. Backup and Restore does not support cloud locations, but you can use Windows SkyDrive and Windows Live Mesh to sync personal files to your cloud storage.
Continue Reading...

How to Fix My Display Driver for Vista

Display drivers allow your video card to interface with the Windows Vista operating system, games and other applications. Bad display card drivers may cause strange graphics problems such as visible artifacts, discolorations, out of place lines and other problems. Prior to fixing your display driver, you must determine whether the driver has been recently updated or if your already-installed driver has become problematic. If you have recently upgraded to Windows Vista from an earlier version of Windows, you must install a Vista-compatible driver.

 Instructions
Determine Video Card Type

 1 Determine the video card type by clicking on "Start," then typing "dxdiag" in the "Start Search" field. Press the "Enter" button.

 2 Click on the "Display" tab. 3 Write down the "Name" and "Manufacturer."  

4 Manually check your computer manufacturer or video card manufacturer's website for updated drivers. Download any updated drivers. Update Driver

 5 Click on "Start," then type "device manager" in the "Start Search" field. Press the "Enter" key.  

6 Double-click "Display adapters," then double-click your primary graphics card.

 7 Click on the "Driver" tab.

 8 Click on "Update Driver." Select "Search Automatically" and follow the on-screen prompts to update your device driver. Select "Browse my computer" if you downloaded a driver.  

9 Click on the "Browse" button and navigate to the location where you downloaded the updated drivers. Double-click the file, then click on "Next." Follow the on-screen prompts to finish the installation. Roll Back Driver  

10 Click on "Start," then type "device manager" in the "Start Search" field. Press the "Enter" key.

11 Double-click "Display adapters," then double-click your primary graphics card.

 12 Click on the "Driver" tab.

 13 Select "Roll Back Driver."  

14 Follow the on-screen prompts to complete the driver rollback.  

Tips & Warnings
Start Windows in "Safe Mode" by pressing "F8" during the boot process and then selecting "Safe Mode" if you have problems accessing the operating system. You may then uninstall, roll back or upgrade your driver by accessing the Control Panel.
Continue Reading...

How to Find the Original Drivers for My Windows Vista Computer

The drivers installed on your computer help Windows Vista communicate with each hardware device. The Windows Vista Installation CD has loads of drivers on it, and even your hard drive has thousands of generic drivers ready to install. While updating drivers is often a good idea, there are times when you may want the original ones that you know worked with Vista. You can use the device manager to roll back drivers to their original state.

 Instructions

 1 Locate the original installation CD that came with Windows Vista. It contains all the original drivers that were used with the original install. If you do not have this disc, continue below.  

2 Go to Device Manager by clicking the "Start" button and typing "Device Manager" in the search bar.  

3 Double-click on any of the categories for a list of the installed devices on your computer. For instance, the computer sound card will be listed under "Sound, Video and Game Controllers."  

4 Right-click on the device you wish to restore to the original Vista drivers and select "Properties."

5 Click on the "Drivers" tab and select "Roll back driver." This will reinstall the previous version.
Continue Reading...

How to Check My Sound Card Driver

With every working piece of hardware installed on your computer, you will find a piece of software, known as drivers. Drivers are installed for every computer device in Windows, and the sound card is no exception. Determining the sound card driver version can help you troubleshoot any problems you might be having with your audio, as well as alert you to the possibility of an update. You can check the sound card drivers in the Device Manager.  

Instructions

1 Right-click on the volume mixer icon on the bottom right corner of your Windows screen and select "Properties" or "Options." This will tell you the sound devices installed on your computer.  

2 Click "Start," then "Settings," then "Control Panel" and select "Device Manager." XP users will need to select "Performance and Maintenance" under the Control Panel screen, then select "System." Click on "Device Manager."  

3 Double-click on the "Sound, video and game controllers" section to show all the audio device installed on Windows.  

4 Right-click on the audio device and select "Properties." The device you select should read the same as the device you looked up in Step 1. For instance, Intel based computers use one of three audio solutions: Realtek, Soundmax and IDT.

 5 Look under the "Driver" tab to see the driver version listed.
Continue Reading...

How to Fix a Headphone Computer Port

The headphone computer port on your system is controlled by the sound card in your computer. The sound card, in turn, is controlled by a software driver file loaded by the operating system. If your headphone jack stops working, it is likely the result of a corrupted or missing driver file. Reinstall the driver to regain full use of the headphone jack on your sound card. Instructions

1 Insert the installation disc supplied with your sound card in your optical drive.  

2 Click "Start," type "Device Manager" in the "Search" box, and press "Enter."  

3 Click the "Sounds" menu and select your sound card.  

4 Click "Driver," "Update," and click the drive containing the installation disc to reinstall the driver file.

 5 Remove the installation disc from the optical drive and reboot your computer to load the driver file for your sound card.
Continue Reading...

How to Check a Bad Sound Card

The sound card is the hardware on the computer that allows sound to be played through your speakers. Some computers have sound cards built into the motherboard but in many cases, the sound card is an actual card that connects to a slot in the computer. If your sound card goes bad you won't be able to hear anything from the computer. However, several other things may be the problem and you should check them before replacing the sound card.

 Instructions  

1 Check the audio level on the computer. Each program may have a sound level that you can change. In Windows there is also a volume level. In the lower right corner of the screen, click on the speaker icon and raise the volume.

 2 Play different sounds to see if the file or source you are playing from is bad. You can try online videos or radio stations, but you should also try to play computer sounds. Go to the Control Panel and click on "Hardware and Sound." Choose "Change system sounds" and click on one of the Windows sounds that has a speaker icon next to it. Click the "test" button. You should hear the sound if the sound card is working.  

3 Check to see if your computer speakers are plugged into the speaker connection on the sound card and that the plug is fully connected and are not loose. Make sure the speaker volume is turned up. Try other speakers to see if the original speakers are bad.

 4 Download new drivers for the sound card. Go to the sound card manufacturer's website and under the support section look for newer drivers. Go to the Control Panel. Click on "Hardware and Sound," then "Device Manager." Under "Sound Video and Game Controllers" right-click on the sound card and choose "Properties." Click on the "Driver" tab, then "Update driver." Select "Browse my computer for driver software." Browse to the driver location and click "Next" and let Windows install the driver. If the computer still doesn't play audio correctly the sound card is likely bad.
Continue Reading...

How to Fix the Headphones Jack on My Computer

The headphone jack on the computer connects to the sound card, a hardware device that controls audio input and output on the PC. The card contains a digital-to-analog converter that converts analog audio into digital signals and visa-versa. The performance of the headphone jack, therefore, depends on how well the sound card functions; if the card doesn't work, then the headphones connected to the PC won't output sound. Reconfiguring the audio settings will often fix problems with audio output on the headphone jack, but if the former fails to resolve the issue, replacing the sound card in its entirety is sometimes the only means of repair.

 Instructions
1 Click "Start." Enter "sound" into the search box. Select "Sound" from beneath Control Panel.

2 Double-click "Headphones." If no "Headphones" option is available, double-click "Speakers."  

3 Click "Properties" on the General tab. Check the Device Status field for errors. Look up the message on Microsoft Support for more assistance, if applicable.  

4 Close the window if the Device Status field reads "This Device Is Working Properly." Go to the "Levels" tab.  

5 Click the speaker button to unmute the volume if the icon contains a red circle-backslash symbol. Drag the top slider to the right to increase the headphone volume.

6 Go to the "Enhancements" tab. Check "Disable all Sound Effects." Go to Applications, and then clear "Allow Applications to Take Exclusive Control of This Device." 

7 Click "OK" to close Headphones Properties or Speakers Properties. Test the audio. If the headphones fail to output sound, unplug the headphones from the computer.

 8 Reconnect the headphones to the PC. Headphone jacks are color-coded lime green on most PCs. Look for the headphones symbol if the jacks are not color-coded. Plug the headphones into the line-out port on the back of the computer if the headphone jack on the front of the PC fails to work, or visa-versa.

 9 Test the headphones. If headphones still won't emit sound, the sound card most likely requires replacement. Replacing the Sound Card  

10 Shut down the computer. Remove the power cord from the back of the PC. Disconnect the keyboard, mouse, monitor and all other peripheral devices.  

11 Loosen the screws found on the back of the case, then slide the cover panel off of the case. Touch the chassis to protect the hardware from electrostatic discharge, or ESD.  

12 Set the computer on its side. Locate the sound card -- found on the opposite of the audio jacks -- and loosen the screw that secures the card to the computer. If no expansion card is located opposite the jacks, the computer uses an integrated sound card which can't be removed.

 13 Remove the new audio card from its protective packaging. Line up the card with an available expansion slot on the motherboard, then push the card down into the slot to install the new audio jacks. Screw the card to the computer case.  

14 Reassemble the computer. Turn on the PC. Boot in to Windows and insert the CD that came with the new expansion card. Follow the onscreen instructions to install the sound card software to the computer.

 15 Plug the headphones into the new line-out jack.

Tips & Warnings 
Go to your computer or motherboard manufacturer's website to look up your computer's specifications. Find out what type of expansion slot the PC uses -- PCI Express on most modern computers -- then purchase a sound card that uses that interface. If you're using a laptop computer, install a replacement sound card to the PCMCIA or ExpressCard slot on the side of the PC. Simply slide the card into the slot. If your computer has an integrated sound card, you may need to go into the BIOS to disable the card. Review the your motherboard or computer's manual for more assistance, as the setup program varies from PC to PC.
Continue Reading...

Problems With X-Fi Sound Cards

Creative labs X-Fi-branded sound cards and other PC sound cards can suffer from various audible problems. You can fix most problems easily by performing some simple operating system and hardware troubleshooting. Rarely, the sound card itself may be damaged, which will require replacement.

 Software and Drivers
Check the software driver installation of the sound card in your operating system for proper functionality. You might find a newer version of the support software on the manufacturer's website. If you are using a beta version of a software driver, it is always a good idea to keep updated to avoid bugs.

 Checking PC Connections
Carefully open your PC case and verify the sound card is fully inserted into the motherboard slot. Any cables attached from the card to the motherboard or the computer power supply must also be fully connected. Do not touch components inside the case without first discharging static electricity on a grounded object or wearing an antistatic bracelet.

 Hardware Troubleshooting
Bad sound performance from your computer can also be caused by other poor performing components. Verify that your system has enough memory to power the application or game you are using. Check that no other system resources are causing conflicts with the peripheral connect interface (PCI) resources allocated to the sound card.
Continue Reading...

Troubleshooting a PC Sound Card

For most computer users, sound is a vital part of the computing experience. Whether watching a movie or playing a game, without sound the experience would be quite boring. The hardware that drives sound in PCs is called a sound card, which is either a separate piece of hardware, or a chip that is built into the motherboard. As with most computer repairs, troubleshooting sound in a PC starts with the basics.

 Plug in the Speakers
Seems obvious, right? This happens more often than you might think. For example, the simple act of moving a monitor from one side of the desk to another can cause tangled cables and power supplies to become unplugged. Make sure your speakers are plugged into the appropriate color-coded jacks on the back of the computer, and the power supply is plugged into a power source. Is the power light on? If not, check the cables again to make sure they are plugged into the right ports. Non-amplified speakers do not have a power cord, and some older types of PC speakers run on batteries. If they do, replace the batteries with new ones, or better yet, buy a newer, more powerful set of speakers.

 Enable System Sound
Once the speakers have power and are turned on, turn the volume knob up to about 60 percent. If you have headphones plugged in, disconnect them. In most cases, when headphones are plugged in, sound will be muted through the speakers. Is sound enabled in your operating system? Is the volume turned up? Most operating systems have a small "speaker" or other audio type icon located on the main task bar. If the icon has a red "X" on it, the sound card is muted. Double-click on the icon to open the sound control panel, then make adjustments to the volume as necessary. If audio support is built into your motherboard, make sure it's enabled in the BIOS. If you have built-in audio plus an additional sound card, disable the device you are not using to avoid conflicts. Most computer manuals detail how to enter, configure and save BIOS settings for each particular model.

 Reinstall or Update Drivers
Sound card drivers sometimes become corrupt or have conflicts after an operating system update, or if additional hardware is installed. If you have a new sound card, reinstall the driver that came with the device. If audio support is built into your motherboard, or the sound card is not a newer model, download and install the latest drivers from the manufacturer's website. If system conflicts occur after installing additional hardware, try uninstalling the sound card drivers, reboot the computer a few times, then install the drivers again. If your operating system has a system restore feature, try restoring the computer to one of the restore points when the sound card worked.  

Open the Computer
PC components sometimes work loose if the computer has been moved frequently. As a final resort, open your computer case and make sure the sound card is seated properly on the motherboard. It's a bit scary to open a computer for the first time, but if you follow the directions in your computer manual, it's actually an easy process. Put in a CD, or play one of your favorite MP3s to test your sound card. If there is still no sound, you may need to purchase new speakers or buy a new sound card.
Continue Reading...

Menjebol/Reset Password BIOS Komputer


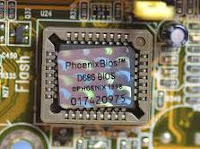
Password BIOS (Basic Input Output System) memang sangat berguna untuk melindungi komputer Sobat supaya tidak ada orang lain yang dapat mengganti konfigurasi komputer Sobat. Tapi password tersebut bisa menjadi malapetaka jika Sobat lupa. Nah, jika Sobat lupa password BIOS Sobat, di bawah ini daftar default password yang aslinya memang disediakan oleh pembuatnya untuk mengantisipasi kejadian password yang terlupakan. Yang perlu Sobat lakukan adalah mencoba satu per satu password tersebut sampai Sobat menemukannya.Silahakan di simak ...

Download E-Booknya disini
01322222, 589589, 589721, 595595, 598598, AWARD SW, AWARD_SW, Award SW, AWARD PW, _award, awkward, J64, j256, j262, j332, j322, HLT, SER, SKY_FOX, aLLy, aLLY, Condo, CONCAT, TTPTHA, aPAf, HLT, KDD, ZBAAACA, ZAAADA, ZJAAADC, djonet, %øåñòü ïpîáåëîâ%, %äåâÿòü ïpîáåëîâ%

AMI BIOS
AMI, A.M.I., AMI SW, AMI_SW, BIOS, PASSWORD, HEWITT RAND, Oder

PHOENIX
BIOS, CMOS, phoenix, PHOENIX
Password lainnya yang bisa Anda cob
LKWPETER, lkwpeter, BIOSTAR, biostar, BIOSSTAR, biosstar, ALFAROME, Syxz, Wodj

Semoga Bermanfaat............

Sumber: Contents of My Brain
Continue Reading...
 
Copyright © 2011. Cksclw blog . All Rights Reserved
Game Downloads | Software Downloads | Appstore for Android | Phones Accessories | Hardware Komputer| Google Adsense | Site Map
Template Design by o-om.com. Powered by blogger