Tampilkan postingan dengan label Hardware Komputer. Tampilkan semua postingan

How to Back Up Data on a Laptop

Backing up your data and important files is a crucial part of computer maintenance, especially on laptops as they are more prone to damage or theft than desktops. Windows 7's built-in tool, called Backup and Restore, can automatically manage regular backups for you, saving your data to an external source such as an external hard drive, network location or even a blank DVD. For scheduled auto-backups, use the Task Scheduler to set reminders for yourself to connect an external backup source.

 Instructions Setting Up Backups 

 1 Click "Start | Control Panel | System and Maintenance | Backup and Restore."  

2 Click "Set up backup" to begin your backup configuration. Windows may take a minute or two to analyze your available backup locations.  

3 Choose where you want to save your backup data. While you can use your optical drive, a DVD doesn't have enough space to back the system image that allows you to restore your existing system settings. You can also use an external hard drive, network-attached storage or a flash drive with sufficient space -- if you're backing up large files or using your system image, you'll want at least 10GB. If you're only backing up small files, such as text documents, you can probably get away with just a few gigabytes.  

4 Select whether you want Windows to choose what directories are backed up, or whether you'd rather pick and choose. A custom setup allows you to remove resource-heavy folders if your backup location is short on space, as well as disable the system image, if necessary, for space issues. Click "Next" when done.

 5 Click "Change Schedule" and select a time and frequency that works best for your needs. Select a time when you know the computer will be on; if you leave your computer on overnight, for convenience, choose a time during the night when you won't be using it.

 6 Click "Save Settings and Run Backup," then "Back Up Now" to start your first backup and save your backup options. Backing up can take several minutes or up to an hour, depending on what you're backing up. Once completed, you can remove your external source. Using Task Scheduler for Reminders

 7 Click "Start | Control Panel | System and Security | Administrative Tools," then choose the "Task Scheduler" tool.  

8 Select "Create Basic Task" in the Actions pane on the right side of the screen.

 9 Enter a name and description for your task, click "Next" and select the trigger for your task at the same frequency as your backups. If you're running a monthly backup, for example, set a monthly reminder prior to the backup time. Click "Next," then choose the time and day for your alert.  

10 Select "Display a Message" or "Send an Email," depending on whether you want to receive an email or have a popup message reminding you to connect an external drive or disc.

 11 Enter the settings for your message -- either the mail settings or the contents of your displayed message.  

12 Review your task and click "Finish" to finalize.  

Tips & Warnings
You can also use cloud-based backup services, such as Carbonite and Mozy, which have programs that run in the background and back up files on a schedule. Unlike Backup and Restore, these do not back up system settings. If for whatever reason you need to turn off your backup, click "Turn off Schedule" on the backup page. When needed, use the Backup and Restore utility to restore your files. Backup and Restore does not support cloud locations, but you can use Windows SkyDrive and Windows Live Mesh to sync personal files to your cloud storage.
Continue Reading...

How to Fix My Display Driver for Vista

Display drivers allow your video card to interface with the Windows Vista operating system, games and other applications. Bad display card drivers may cause strange graphics problems such as visible artifacts, discolorations, out of place lines and other problems. Prior to fixing your display driver, you must determine whether the driver has been recently updated or if your already-installed driver has become problematic. If you have recently upgraded to Windows Vista from an earlier version of Windows, you must install a Vista-compatible driver.

 Instructions
Determine Video Card Type

 1 Determine the video card type by clicking on "Start," then typing "dxdiag" in the "Start Search" field. Press the "Enter" button.

 2 Click on the "Display" tab. 3 Write down the "Name" and "Manufacturer."  

4 Manually check your computer manufacturer or video card manufacturer's website for updated drivers. Download any updated drivers. Update Driver

 5 Click on "Start," then type "device manager" in the "Start Search" field. Press the "Enter" key.  

6 Double-click "Display adapters," then double-click your primary graphics card.

 7 Click on the "Driver" tab.

 8 Click on "Update Driver." Select "Search Automatically" and follow the on-screen prompts to update your device driver. Select "Browse my computer" if you downloaded a driver.  

9 Click on the "Browse" button and navigate to the location where you downloaded the updated drivers. Double-click the file, then click on "Next." Follow the on-screen prompts to finish the installation. Roll Back Driver  

10 Click on "Start," then type "device manager" in the "Start Search" field. Press the "Enter" key.

11 Double-click "Display adapters," then double-click your primary graphics card.

 12 Click on the "Driver" tab.

 13 Select "Roll Back Driver."  

14 Follow the on-screen prompts to complete the driver rollback.  

Tips & Warnings
Start Windows in "Safe Mode" by pressing "F8" during the boot process and then selecting "Safe Mode" if you have problems accessing the operating system. You may then uninstall, roll back or upgrade your driver by accessing the Control Panel.
Continue Reading...

How to Find the Original Drivers for My Windows Vista Computer

The drivers installed on your computer help Windows Vista communicate with each hardware device. The Windows Vista Installation CD has loads of drivers on it, and even your hard drive has thousands of generic drivers ready to install. While updating drivers is often a good idea, there are times when you may want the original ones that you know worked with Vista. You can use the device manager to roll back drivers to their original state.

 Instructions

 1 Locate the original installation CD that came with Windows Vista. It contains all the original drivers that were used with the original install. If you do not have this disc, continue below.  

2 Go to Device Manager by clicking the "Start" button and typing "Device Manager" in the search bar.  

3 Double-click on any of the categories for a list of the installed devices on your computer. For instance, the computer sound card will be listed under "Sound, Video and Game Controllers."  

4 Right-click on the device you wish to restore to the original Vista drivers and select "Properties."

5 Click on the "Drivers" tab and select "Roll back driver." This will reinstall the previous version.
Continue Reading...

How to Check My Sound Card Driver

With every working piece of hardware installed on your computer, you will find a piece of software, known as drivers. Drivers are installed for every computer device in Windows, and the sound card is no exception. Determining the sound card driver version can help you troubleshoot any problems you might be having with your audio, as well as alert you to the possibility of an update. You can check the sound card drivers in the Device Manager.  

Instructions

1 Right-click on the volume mixer icon on the bottom right corner of your Windows screen and select "Properties" or "Options." This will tell you the sound devices installed on your computer.  

2 Click "Start," then "Settings," then "Control Panel" and select "Device Manager." XP users will need to select "Performance and Maintenance" under the Control Panel screen, then select "System." Click on "Device Manager."  

3 Double-click on the "Sound, video and game controllers" section to show all the audio device installed on Windows.  

4 Right-click on the audio device and select "Properties." The device you select should read the same as the device you looked up in Step 1. For instance, Intel based computers use one of three audio solutions: Realtek, Soundmax and IDT.

 5 Look under the "Driver" tab to see the driver version listed.
Continue Reading...

How to Fix a Headphone Computer Port

The headphone computer port on your system is controlled by the sound card in your computer. The sound card, in turn, is controlled by a software driver file loaded by the operating system. If your headphone jack stops working, it is likely the result of a corrupted or missing driver file. Reinstall the driver to regain full use of the headphone jack on your sound card. Instructions

1 Insert the installation disc supplied with your sound card in your optical drive.  

2 Click "Start," type "Device Manager" in the "Search" box, and press "Enter."  

3 Click the "Sounds" menu and select your sound card.  

4 Click "Driver," "Update," and click the drive containing the installation disc to reinstall the driver file.

 5 Remove the installation disc from the optical drive and reboot your computer to load the driver file for your sound card.
Continue Reading...

How to Check a Bad Sound Card

The sound card is the hardware on the computer that allows sound to be played through your speakers. Some computers have sound cards built into the motherboard but in many cases, the sound card is an actual card that connects to a slot in the computer. If your sound card goes bad you won't be able to hear anything from the computer. However, several other things may be the problem and you should check them before replacing the sound card.

 Instructions  

1 Check the audio level on the computer. Each program may have a sound level that you can change. In Windows there is also a volume level. In the lower right corner of the screen, click on the speaker icon and raise the volume.

 2 Play different sounds to see if the file or source you are playing from is bad. You can try online videos or radio stations, but you should also try to play computer sounds. Go to the Control Panel and click on "Hardware and Sound." Choose "Change system sounds" and click on one of the Windows sounds that has a speaker icon next to it. Click the "test" button. You should hear the sound if the sound card is working.  

3 Check to see if your computer speakers are plugged into the speaker connection on the sound card and that the plug is fully connected and are not loose. Make sure the speaker volume is turned up. Try other speakers to see if the original speakers are bad.

 4 Download new drivers for the sound card. Go to the sound card manufacturer's website and under the support section look for newer drivers. Go to the Control Panel. Click on "Hardware and Sound," then "Device Manager." Under "Sound Video and Game Controllers" right-click on the sound card and choose "Properties." Click on the "Driver" tab, then "Update driver." Select "Browse my computer for driver software." Browse to the driver location and click "Next" and let Windows install the driver. If the computer still doesn't play audio correctly the sound card is likely bad.
Continue Reading...

How to Fix the Headphones Jack on My Computer

The headphone jack on the computer connects to the sound card, a hardware device that controls audio input and output on the PC. The card contains a digital-to-analog converter that converts analog audio into digital signals and visa-versa. The performance of the headphone jack, therefore, depends on how well the sound card functions; if the card doesn't work, then the headphones connected to the PC won't output sound. Reconfiguring the audio settings will often fix problems with audio output on the headphone jack, but if the former fails to resolve the issue, replacing the sound card in its entirety is sometimes the only means of repair.

 Instructions
1 Click "Start." Enter "sound" into the search box. Select "Sound" from beneath Control Panel.

2 Double-click "Headphones." If no "Headphones" option is available, double-click "Speakers."  

3 Click "Properties" on the General tab. Check the Device Status field for errors. Look up the message on Microsoft Support for more assistance, if applicable.  

4 Close the window if the Device Status field reads "This Device Is Working Properly." Go to the "Levels" tab.  

5 Click the speaker button to unmute the volume if the icon contains a red circle-backslash symbol. Drag the top slider to the right to increase the headphone volume.

6 Go to the "Enhancements" tab. Check "Disable all Sound Effects." Go to Applications, and then clear "Allow Applications to Take Exclusive Control of This Device." 

7 Click "OK" to close Headphones Properties or Speakers Properties. Test the audio. If the headphones fail to output sound, unplug the headphones from the computer.

 8 Reconnect the headphones to the PC. Headphone jacks are color-coded lime green on most PCs. Look for the headphones symbol if the jacks are not color-coded. Plug the headphones into the line-out port on the back of the computer if the headphone jack on the front of the PC fails to work, or visa-versa.

 9 Test the headphones. If headphones still won't emit sound, the sound card most likely requires replacement. Replacing the Sound Card  

10 Shut down the computer. Remove the power cord from the back of the PC. Disconnect the keyboard, mouse, monitor and all other peripheral devices.  

11 Loosen the screws found on the back of the case, then slide the cover panel off of the case. Touch the chassis to protect the hardware from electrostatic discharge, or ESD.  

12 Set the computer on its side. Locate the sound card -- found on the opposite of the audio jacks -- and loosen the screw that secures the card to the computer. If no expansion card is located opposite the jacks, the computer uses an integrated sound card which can't be removed.

 13 Remove the new audio card from its protective packaging. Line up the card with an available expansion slot on the motherboard, then push the card down into the slot to install the new audio jacks. Screw the card to the computer case.  

14 Reassemble the computer. Turn on the PC. Boot in to Windows and insert the CD that came with the new expansion card. Follow the onscreen instructions to install the sound card software to the computer.

 15 Plug the headphones into the new line-out jack.

Tips & Warnings 
Go to your computer or motherboard manufacturer's website to look up your computer's specifications. Find out what type of expansion slot the PC uses -- PCI Express on most modern computers -- then purchase a sound card that uses that interface. If you're using a laptop computer, install a replacement sound card to the PCMCIA or ExpressCard slot on the side of the PC. Simply slide the card into the slot. If your computer has an integrated sound card, you may need to go into the BIOS to disable the card. Review the your motherboard or computer's manual for more assistance, as the setup program varies from PC to PC.
Continue Reading...

Problems With X-Fi Sound Cards

Creative labs X-Fi-branded sound cards and other PC sound cards can suffer from various audible problems. You can fix most problems easily by performing some simple operating system and hardware troubleshooting. Rarely, the sound card itself may be damaged, which will require replacement.

 Software and Drivers
Check the software driver installation of the sound card in your operating system for proper functionality. You might find a newer version of the support software on the manufacturer's website. If you are using a beta version of a software driver, it is always a good idea to keep updated to avoid bugs.

 Checking PC Connections
Carefully open your PC case and verify the sound card is fully inserted into the motherboard slot. Any cables attached from the card to the motherboard or the computer power supply must also be fully connected. Do not touch components inside the case without first discharging static electricity on a grounded object or wearing an antistatic bracelet.

 Hardware Troubleshooting
Bad sound performance from your computer can also be caused by other poor performing components. Verify that your system has enough memory to power the application or game you are using. Check that no other system resources are causing conflicts with the peripheral connect interface (PCI) resources allocated to the sound card.
Continue Reading...

Troubleshooting a PC Sound Card

For most computer users, sound is a vital part of the computing experience. Whether watching a movie or playing a game, without sound the experience would be quite boring. The hardware that drives sound in PCs is called a sound card, which is either a separate piece of hardware, or a chip that is built into the motherboard. As with most computer repairs, troubleshooting sound in a PC starts with the basics.

 Plug in the Speakers
Seems obvious, right? This happens more often than you might think. For example, the simple act of moving a monitor from one side of the desk to another can cause tangled cables and power supplies to become unplugged. Make sure your speakers are plugged into the appropriate color-coded jacks on the back of the computer, and the power supply is plugged into a power source. Is the power light on? If not, check the cables again to make sure they are plugged into the right ports. Non-amplified speakers do not have a power cord, and some older types of PC speakers run on batteries. If they do, replace the batteries with new ones, or better yet, buy a newer, more powerful set of speakers.

 Enable System Sound
Once the speakers have power and are turned on, turn the volume knob up to about 60 percent. If you have headphones plugged in, disconnect them. In most cases, when headphones are plugged in, sound will be muted through the speakers. Is sound enabled in your operating system? Is the volume turned up? Most operating systems have a small "speaker" or other audio type icon located on the main task bar. If the icon has a red "X" on it, the sound card is muted. Double-click on the icon to open the sound control panel, then make adjustments to the volume as necessary. If audio support is built into your motherboard, make sure it's enabled in the BIOS. If you have built-in audio plus an additional sound card, disable the device you are not using to avoid conflicts. Most computer manuals detail how to enter, configure and save BIOS settings for each particular model.

 Reinstall or Update Drivers
Sound card drivers sometimes become corrupt or have conflicts after an operating system update, or if additional hardware is installed. If you have a new sound card, reinstall the driver that came with the device. If audio support is built into your motherboard, or the sound card is not a newer model, download and install the latest drivers from the manufacturer's website. If system conflicts occur after installing additional hardware, try uninstalling the sound card drivers, reboot the computer a few times, then install the drivers again. If your operating system has a system restore feature, try restoring the computer to one of the restore points when the sound card worked.  

Open the Computer
PC components sometimes work loose if the computer has been moved frequently. As a final resort, open your computer case and make sure the sound card is seated properly on the motherboard. It's a bit scary to open a computer for the first time, but if you follow the directions in your computer manual, it's actually an easy process. Put in a CD, or play one of your favorite MP3s to test your sound card. If there is still no sound, you may need to purchase new speakers or buy a new sound card.
Continue Reading...

Menjebol/Reset Password BIOS Komputer


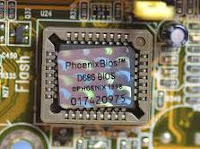
Password BIOS (Basic Input Output System) memang sangat berguna untuk melindungi komputer Sobat supaya tidak ada orang lain yang dapat mengganti konfigurasi komputer Sobat. Tapi password tersebut bisa menjadi malapetaka jika Sobat lupa. Nah, jika Sobat lupa password BIOS Sobat, di bawah ini daftar default password yang aslinya memang disediakan oleh pembuatnya untuk mengantisipasi kejadian password yang terlupakan. Yang perlu Sobat lakukan adalah mencoba satu per satu password tersebut sampai Sobat menemukannya.Silahakan di simak ...

Download E-Booknya disini
01322222, 589589, 589721, 595595, 598598, AWARD SW, AWARD_SW, Award SW, AWARD PW, _award, awkward, J64, j256, j262, j332, j322, HLT, SER, SKY_FOX, aLLy, aLLY, Condo, CONCAT, TTPTHA, aPAf, HLT, KDD, ZBAAACA, ZAAADA, ZJAAADC, djonet, %øåñòü ïpîáåëîâ%, %äåâÿòü ïpîáåëîâ%

AMI BIOS
AMI, A.M.I., AMI SW, AMI_SW, BIOS, PASSWORD, HEWITT RAND, Oder

PHOENIX
BIOS, CMOS, phoenix, PHOENIX
Password lainnya yang bisa Anda cob
LKWPETER, lkwpeter, BIOSTAR, biostar, BIOSSTAR, biosstar, ALFAROME, Syxz, Wodj

Semoga Bermanfaat............

Sumber: Contents of My Brain
Continue Reading...

Inilah 10 Virus Komputer Paling Ganas di 2011


Beragam jenis virus berkeliaran di sepanjang 2011. Mulai dari Stuxnet, Rammit, Webmoner, dan beberapa jenis virus lain yang cukup sulit dibasmi.

1. Stuxnet, merupakan salah satu virus yang cukup heboh karena efek yang cukup nyata. Dengan membuat space hardisk korban menjadi habis sehingga memunculkan peringatan “Low Disk Space”. Hal ini karena Stuxnet membuat file sampah berukuran besar yang terus membengkak.

2. Ramnit, merupakan salah satu virus yang telah sukses menggantikan peran Sality di awal tahun 2011 dalam menginfeksi komputer dan file executable. Sejak Januari hingga saat ini, sudah banyak komputer yang telah terinfeksi virus ini.

Selain Ramnit virus lain yang menyebar di awal tahun 2011 yaitu Webmoner dan FontAgent.
3. Webmoner, virus ini memiliki kemiripan dengan Ramnit yaitu membuat 4 file shortcut, tetapi file virus pemicunya justru memiliki extension sys yaitu file mso.sys.

4. Sedangkan FontAgent juga memiliki file shortcut, hanya saja file virus pemicunya justru memiliki extension fon (Font file) seperti setup50045.fon atau setup50039.fon.

Demam Facebook juga ikut merambah metode penyerangan virus di tahun 2011 ini. Dengan memanfaatkan fungsi status dan Facebook Chat, banyak hal yang terjadi seperti pishing (artikel Pishing FB Chat), celah XSS (artikel XSS), scam (artikel Scam) hingga penyebaran malware.

5. Kolab, merupakan virus Facebook Chat yang cukup heboh karena memiliki kemampuan metamorphic. Setiap malware yang disebarkan melalui FB Chat, walaupun memiliki ukuran dan nama yang sama, tetapi justru memiliki algoritma hash yang berbeda.

Selain itu, Kolab memanfaatkan teknik FakeURL (link palsu) seolah-olah pengguna komputer mendownload file gambar (JPG), padahal yang diunduh adalah virus.

6. FakeAV, salah satu virus yang cukup terkenal sejak 2 tahun lalu juga tidak mau kalah di tahun ini. Tercatat 2 artikel telah dipublish oleh Vaksincom terhadap serangan varian malware ini.

FakeAV merupakan virus yang menggunakan metode aplikasi keamanan palsu (antivirus palsu) untuk mengelabui pengguna komputer dengan notifikasi dan pesan-pesan bahwa komputer telah terinfeksi virus dan meminta pengguna komputer untuk mengaktifkan antivirus palsu tersebut dengan cara melakukan pembayaran online.

7. Slugin, salah satu varian virus yang menyebarkan spam juga ikut meramaikan persaingan di tahun 2011. Jika di tahun-tahun sebelumnya ada Virut, maka tahun ini Slugin menjadi biang dari penyebaran spam yang tidak jelas.

Dengan memanfaatkan akun email pengguna komputer yang terinfeksi, maka Slugin mengirimkan spam kepada kontak-kontak yang dimiliki oleh pengguna komputer tersebut.

8. BitCoinMiner/DorkBot, inilah trojan Zbot pencari uang yang cukup handal. Dengan adanya mata uang digital, dan adanya pula program bisnis penghasil uang dengan cara menambang (bitcoin mining), pembuat virus menjadikan hal ini sebagai salah satu cara yang cukup praktis.

Dengan melakukan BitCoin Mining pada ribuan komputer terinfeksi, maka akan dengan mudah menghasilkan uang yang cukup banyak. BitCoinMiner sendiri memiliki 2 varian virus yang pertama menggunakan icon abjad pada file virus sebagai penyebaran.

Sedangkan varian kedua menggunakan metode dari Kolab dengan menyebarkan file virus melalui Facebook Chat. File tersebut pun berbeda, karena menggunakan icon wanita sexy untuk menarik perhatian.

9. MacSecurity, varian virus ini cukup heboh di pertengahan tahun 2011 karena memiliki 5 varian yang berbeda tetapi sama yaitu MacDefender, MacGuard, MacProtector, MacShield dan MacSecurity.

Memiliki karakter yang sama seperti FakeAV yang berjalan di Windows, MacSecurity mengelabui pengguna komputer dengan notifikasi dan pesan-pesan bahwa komputer telah terinfeksi virus dan meminta pengguna komputer untuk mengaktifkan antivirus palsu tersebut dengan cara melakukan pembayaran online.

10. Virus Android, bak menggantikan peran dari Windows Mobile, Android di tahun ini cukup meroket dan bahkan hampir setiap hari banyak aplikasi yang dibuat khusus untuk sistem operasi tersebut.

Tetapi justru hal tersebut menjadi buah simalakama karena di antara jutaan aplikasi itu merupakan virus jejadian. Di awali dari trojan Android.

Plankton yang menyerang menggunakan nama aplikasi game Angry Birds, hingga Android.Gongfu, Android.Wukong, Android.SmsSend dan Android.DreamExploid yang banyak menyerang aplikasi-aplikasi, terutama game.

sumber : detikinet
URL : http://www.detikinet.com/read/2011/12/26/164720/1799900/323/10-virus-komputer-paling-ganas-di-2011/?i991101105
Continue Reading...

PlexEasy PC Free DVD Burner, DVD Drive yang Tak Butuh Komputer

DVD memang bukan menjadi pilihan pertama ketika kita memback up data. Banyak orang yang cenderung memilih hard disk eksternal atau bahkan flash disk yang memiliki kapasitas penyimpanan lebih banyak. Namun fenomena tersebut tak menyurutkan sebuah perusahaan bernama Plextor untuk merilis produk DVD Drive terbarunya.

Produk bernama PlexEasy PC Free DVD burner tersebut dapat dipakai tanpa menggunakan bantuan sebuah PC. Seperti namanya, Free PC.
DVD drive ini dilengkapi dengan sebuah layar LCD, slot SD card dan beberapa tombol. Selain itu terdapat pula dua buah port USB yang digunakan untuk menghubungkan DVD drive ini dengan gadget lain. Terlebih alat ini juga kompatibel dengan perangkat berbasis iOS, Android dan BlackBerry. Untuk OS Windows Phone dan OS lainnya, nampaknya harus mengantri dulu.

Namun sayangnya, sampai saat ini belum ada informasi mengenai harga dari produk ini. Jadi tunggu saja bagi anda yang kesengsem dengan produk ini.
Continue Reading...

Desain Keyboard Dan Mouse Unik Terbuat Dari Kaca


Apa jadinya jika mouse dan keyboard yang anda pakai terbuat dari kaca? Mungkin PC anda akan terlihat mirip dengan cinderella dengan sepatu kacanya. Namun hal tersebut bukanlah bayangan saja, Kickstarter bisa saja mewujudkan hal tersebut.

Keyboard dan mouse yang terbuat dari kaca tersebut didesain oleh Jason Giddings, dan menggunakan teknologi Frustated Total Internal Reflection (FTIR) denga menempatkan sebuah kamera untuk menangkap cahaya inframerah yang dipantulkan. Secara keseluruhan, desain tersebut adalah sebuah desain yang revolusioner, dan sangat berbau masa depan banget.

Selain itu, kedua alat ini menurut rencana akan menggunakan software open source. Sehingga pihak developer dapat dengan mudah mengembangkannya.

Visual mockup desain kedua alat ini dapat dilihat dalam halaman donasi kickstarter. Giddings mengatakan bahwa untuk membuat kedua benda tersebut menjadi nyata, dia membutuhkan paling tidak 50 ribu USD. Jika anda mau berpartisipasi menyumbang 10 USD, mungkin anda bisa memberikan nama kedua alat ini, atau bahkan menjadi orang pertama yang memiliki kedua alat tersebut.

Continue Reading...

Cara Membuat Jaringan LAN Komputer

Kali ini saya ingin membahas tentang cara membuat JARINGAN LAN. Apabila sobat di rumah mempunyai komputer lebih dari satu, dan masing-masing komputer ingin terhubung antara satu dengan yang lainnnya supaya bisa sharing data, printer, sharing koneksi internet dll, kita bisa lakukan dengan membuat jaringan komputer LAN ( Local Area Network ) sederhana..

pada postingan kali ini kita gunakan koneksi kabel yaitu menggunakan kabel data UTP (Unshielded twisted pair), yaitu standard kabel untuk koneksi jaringan LAN.
Komputer yang dipakai pada saat ini umumnya sudah dilengkapi dengan LAN Card atau disebut juga NIC (Network Interface Controller), atau Ethernet Card.


Kalau jumlah komputer yang akan dikoneksikan hanya dua buah, kita hanya cukup menyediakan satu buah kabel UTP dengan panjang sesuai jarak antara komputernya yang di kedua ujung kabelnya telah dipasangi konektor RJ-45(standard konektor untuk kabel LAN UTP) dengan konfigurasi Cross/ silang.


• Kalau Jumlah komputer yang akan dikoneksikan lebih dari 2 buah, maka kita harus menambahkan suatu alat yang bernama Switch atau Hub. Pada saat ini harga sebuah switch untuk standard rumahan sudah sangat terjangkau .
Dari masing - masing komputer dihubungkan ke switch menggunakan kabel UTP dengan konektor RJ-45 di kedua ujungnya dengan konfigurasi Straight/lurus.


• Pemasangan konektor pada kabel UTP bisa dibuat sendiri, tetapi untuk mudahnya sobat tinggal pergi saja ke toko komputer yang juga menyediakan peralatan jaringan, dan tinggal bilang untuk membeli kabel UTP sekalian pasangkan konektornya dengan konfigurasi cross/silang untuk koneksi komputer ke komputer(dua buah komputer), atau straight/lurus untuk koneksi lebih dari 2 komputer /menggunakan switch.

Konfigurasi Alamat IP (Internet Protocol / TCP IP )
Agar dapat saling berkomunikasi , masing – masing komputer harus diberi alamai IP

• Masuk ke Network Connection (Start-->Control Panel -->Network Connection )
• Pilih/dobel klik Local Area Connection
• Dobel klik pada Internet Protocol (TCP / IP)
• Klik Use The following IP address, kemudian isi IP address dan subnet Mask
Misal,
komputer1 IP Address : 192.168.0.1
komputer2 IP Address : 192.168.0.2
komputer3 IP Address : 192.168.0.3
komputer4 IP Address : 192.168.0.4
dst..
Subnet Mask harus sama : 255.255.255.0

Untuk mengetahui berhasil tidaknya koneksi lakukan perintah ping dari komputer satu ke komputer lainnya
Misal dari komputer1 ke komputer2 :
• Di Komputer1 : Klik Start -->Klik Run-->ketik CMD --> klik OK, maka akan tampil Command Prompt
• Ketik ping 192.168.0.2 tekan enter
harus ada Reply dari komputer2
•Lakukan perintah yang sama untuk mengetahui koneksi ke komputer yang lainnya.

Semoga Bermanfaat...
Continue Reading...

AMD Rilis Chip 16 Core AMD Opteron 6200 & Opteron 4200 dengan 8 Core


Pembuat chip AMD telah mulai memasarkan prosesor seri Opteron 6200 dan 4200 yang sebelumnya dikenal sebagai Interlagos dan Valencia. Yang pertama adalah memiliki 16 core, meskipun  didasarkan pada arsitektur Bulldozer yang mencakup delapan modul dua inti. Ditargetkan untuk kelas server perusahaan , AMD menjanjikan kinerja 84 persen lebih baik dan bandwidth memori 72 persen lebih besar.
Ada 18 chip yang dirilis secara total,  sepuluh di antaranya seri 6200 dengan kisaran kecepatan clock dari 1.6GHz sampai ke 3.3GHz . Chip Opteron seri 4200; delapan yang tersisa, memiliki kisaran kecepatan clock yang sama. Salah satu perbedaan utama antara 4200s dan 6200s adalah cache 8MB L3 dan cache 16MB pada 6200 serta jumlah core pada 4200 hanya 6 sampai 8 core.
Sementara itu, pada 2012 akan merilis dari AMD Opteron seri 3000. Chip seri ini yang pertama akan memiliki kode Zurich , dengan empat sampai delapan core. Chip ini dimaksudkan untuk web hosting dan web server ultra-dense , ultra-low power 1P; seperti server mikro. Chip Zurich ini akan menggunakan Socket yang baru AM3 +.
Berikut ini tabel varian chip AMD Opteron 4200 dan 6200:
Series Model number Core/Thread Count Frequency Max Turbo L3 Cache TDP Price
4200 series “Valencia” 4226 6/6 2.7GHz 3.1GHz 8MB 95W $125
4228 HE 6/6 2.8GHz 3.6GHz 8MB 65W $255
4234 6/6 3.1GHz 3.5GHz 8MB 95W $174
4238 6/6 3.4GHz 3.7GHz 8MB 95W $255
4256 EE 8/8 1.6GHz 2.8GHz 8MB 35W $377
4274 HE 8/8 2.6GHz 3.5GHz 8MB 65W $377
4280 8/8 2.8GHz 3.5GHz 8MB 95W $255
4284 8/8 3.3GHz 3.7GHz 8MB 95W $316
6200 series “Interlagos” 6204 4/4 3.3GHz N/A 16MB 115W $405
6212 8/8 2.6GHz 3.2GHz 16MB 115W $266
6220 8/8 3.0GHz 3.6GHz 16MB 115W $523
6234 12/12 2.4GHz 3.1GHz 16MB 115W $377
6238 12/12 2.6GHz 3.3GHz 16MB 115W $455
6262 HE 16/16 1.6GHz 2.9GHz 16MB 85W $523
6272 16/16 2.1GHz 3.1GHz 16MB 115W $523
6274 16/16 2.2GHz 3.2GHz 16MB 115W $639
6276 16/16 2.3GHz 3.3GHz 16MB 115W $788
6282 SE 16/16 2.6GHz 3.5GHz 16MB 140W $1,019
Continue Reading...

Internal Random Access Memory (RAM)


Internal random access memory (RAM) adalah memori komputer yang dibangun langsung ke dalam chip mikrokontroler, seperti central processing unit komputer (CPU). Internal RAM ini digunakan oleh programmer untuk meningkatkan kecepatan fungsi program yang langsung ditangani RAM internal, dan memastikan bahwa proses antri data yang akan diproses lebih cepat

Internal RAM ini dapat mempercepat kinerja prosesor karena instruksi yang sering digunakan dapat dikirimkan ke CPU lebih cepat daripada menarik mereka dari RAM eksternal.

CPU memiliki tiga level cache, atau RAM internal. Cache prosesor terdiri dari statis RAM (SRAM) tetapi bukan memori yang terpasang pada motherboard dan yang disebut RAM dinamis (DRAM). Ketika CPU mencari data, cek pertama dilakukan pada cache Level 1 (L1), lalu Level 2 (L2), lalu Level 3 (L3). Jika data tidak ditemukan maka CPU akan menarik data dari DRAM.

Dalam prosesor, cache L1 ditugaskan untuk inti pada prosesor itu sendiri. Ini adalah RAM internal yang tercepat karena bertindak sebagai buffer untuk instruksi yang akan diserahkan kepada inti prosesor. Dalam multi-core, ini dilakukan secara substansial dan dapat mempercepat pengolahan jika beberapa core menangani pekerjaan secara individual melalui permintaan L1 cache.

Cache L2 dalam paket CPU masih dianggap RAM internal. Cache L2 ini tidak dibangun langsung ke chip CPU sebagaimana cache L1. Inti cache L2 didedikasikan untuk dapat beroperasi secara paralel bersama L1, sehingga ada tambahan kecepatan dengan adanya L2. Namun, Cache L2 lebih lambat dari cache L1.

Cache L3 tidak dalam paket CPU, sehingga tidak dianggap RAM internal dan mempunyai fungsi tersendiri. Cache L3adalah RAM eksternal tercepat yang tersedia dalam komputer. Semua CPUsaat ini selalu berbagi core cache L3.

Seluruh proses dalam CPU merupakan antrian data mulai dari data DRAM eksternal, masuk ke RAM internal dan akhirnya ke instruksi pemrosesan yang sebenarnya. Fungsi tertentu dalam program apapun selalu menetapkan prioritas proses data, artinya yang lebih duluan akan dipindahkan ke bagian depan antrian sebagai bagian dari optimasi program individu. Data dengan prioritas tertinggi ditujukan langsung ke cache L1 untuk pemrosesan tercepat, dan antrian prioritas terendah akan melalui seluruh proses.

Demikian penjelasan Internal Random Access Memory (RAM) dan semoga anda bisa membedakannya dengan DRAM atau RAM eksternal.
Continue Reading...

Qualcomm S4 Prosesor Mobile Dual Core Mencapai 2.5 Ghz dan Lebih Hemat Daya


Qualcomm telah berbicara tentang prosesor yang akan datang yaitu Snapdragon S4 nya yang diperuntukkan mobile sejak mereka belum disebut chip S4. Kami mendapati informasi bahwa prosesor ini akan mampu berjalan pada kecepatan clock sampai 2,5 GHz dan juga akan mendukung Windows 8 serta Android, Linux, dan sistem operasi lain.

Sekarang Qualcomm telah mengeluarkan rinci detail . Berikut adalah beberapa garis besarnya:

Qualcomm akan berganti dari chip 45nm untuk chip 28nm yang lebih efisien dengan S4.
Kecepatan clock akan berkisar dari 1,5 GHz sampai 2,5 Ghz.
Krait CPU baru menggunakan memori dual channel dan menawarkan meningkatkan kinerja 1,6 kali dari CPU Scorpion Qualcomm dengan penggunakan listrik 25 sampai 40 persen lebih hemat
Qualcomm mengharapkan chip S4 untuk menggunakan 25 sampai 40% lebih sedikit daya dibandingkan chip sebelumnya, dan menawarkan kinerja 60% lebih baik.
Core prosesor yang tidak digunakan dapat “collapse” untuk menghemat daya
Grafis Adreno 225 diharapkan untuk menawarkan kinerja 50% lebih baik dari Adreno grafis 220 saat ini .
Adreno 225 akan mendukung OpenGL ES 1.1 dan 2.0 dan DirectX 9.3.
Prosesor akan mendukung 2G, 3G, GSM, CDMA, EV-DO, dan koneksi data mobile LTE 4G di seluruh dunia serta WiFi, Bluetooth, dan GPS.

Kita mungkin tidak akan benar-benar melihat ponsel atau tablet dengan chip S4 baru sampai awal 2012, dan chip baru Qualcomm akan berkompetisi terhadap prosesor terbaru dari NVIDIA, Texas Instruments, dan lain-lain.
Continue Reading...

Determine How Much Computer RAM Memory You Need for Vista or XP

Find out how much computer RAM memory you need to run Windows Vista or XP efficiently. Most Computer don't have enough memory installed, causing them to run slowly.

Instructions
1.Most computers purchased from a retail store or even online from the manufacturer are equipped with a minimal amount of memory to keep prices low. If you have less than 1GB in Windows XP or less than 2GB in Windows Vista, your computer could be performing slower than it was designed for. Adding more memory can actually speed up your computer a great deal, as I've proven to hundreds of people already.

Take the steps below to find out how much memory you need and how much you have now.

2.How much memory do I need?

- Windows XP (Home or Professional): If you have less than 1GB of memory on XP, your PC will run faster with more memory. Windows XP Home or Professional versions will run decent with 1GB of memory, though 2GB is recommended for power users (who run more than 2-3 programs or open more than a few windows at a time). The maximum memory you can install for XP is 4GB (although it will only show around 3.5GB when you check the system properties as indicated below. Your computer itself may have a lower memory maximum it will accept. See below to find out how much the computer will allow.

- Windows Vista: Windows Vista requires much more memory than XP. If you have less than 2GB of memory in any version of Vista, your PC will run faster with more memory. For Vista Ultimate or Business versions, you'll want to add 3-4GB to preserve your sanity. Vista will allow a maximum of 4GB (may show less is installed in the System Properties. See below to find out how much the computer will allow.

Although Microsoft shows recommended minimum memory requirements on their website, this is only enough to barely run XP or Vista (and at an agonizingly slow pace at that!

3.Find out how much memory you have in your computer:

- For Windows XP: Click Start, then right click "My Computer" and choose "Properties". Click the top tab named "General" if needed and look for XX of RAM above the Support Information button.

- For Windows Vista: Do the same as above or Click Start > Control Panel > Performance & Maintenance > System. Click the top tab named "General" if needed and look for XX of RAM above the Support Information button.

Tips & Warnings
Memory is the cheapest performance boost you can buy for your computer.

Installing memory is about as easy as installing a light bulb.

Buying memory online can be much cheaper than from retail stores, but buy from a respected online memory store such as http://www.TheUpgradePlace.com.

If you're not sure what memory you need, let an expert help you determine this for you. This will save you some headaches.
Continue Reading...

Determine How Much Memory a Computer Needs

Whether you're in the market for a new Computer or seeking to upgrade your existing PC, determining how much memory your computer needs is vital. Too much memory can leave wasted space on your hard drive. Too little computer memory can overload your PC and cause it to operate sluggishly.
Instructions
Determining Current Memory of Existing PC for Upgrade
1.Click the "Start" tab in your Windows operating system.

2.Select "Control Panel" from the list on the right.

3.Choose the "Performance and Maintenance" tool.

4.Click "See Basic Information About Your Computer."

5.View the specification on your computer's memory. Windows will show a "System Properties" box in which the "General" tab will be selected by default. Under the "Computer" heading, Windows will display your computer's memory.

6.Decide if this amount is enough to handle your current needs. If your computer runs slowly with its present memory, it's time for an upgrade. Most systems will allow you to add 1GB of memory to your hard drive.

Determining Needed Computer Memory for a New PC
1.Write down all the things for which you currently use your computer. Be realistic so you can have a sense of how much memory your new PC will need.

2.Decide what you may want to use your computer for in the future and make a list of programs you may want included with your PC.

3.Make a list of programs you may purchase separately and incorporate them when you assess how much computer memory you need.
Continue Reading...

Determine How Much Memory You Need When Buying a New Computer

Computer memory, or "RAM" (Random Access Memory), is very important when purchasing a new computer. RAM makes sure that the computer is loading processes correctly. It is the temporary storage for anything you load up, from your Internet browser to that game of solitaire; any information within that session will be lost after you shut down. RAM also speeds the computer up because more programs can be temporarily placed into it so access is quicker. How much RAM you'll need ultimately depends on what you plan to do with your computer. For instance when looking on the back of photo-editing software Adobe Photoshop CS3, it states that you need 512MB of RAM, but 1GB is recommended. Having the recommended RAM will give your computer optimal performance for that application.

Instructions
1.Write a list of programs that you want to have on your new computer, such as graphics software, Microsoft Word, and your operating system. This information will give you a baseline to work with.

2.Check the system requirements for each program on your list to see how much RAM will run the program optimally. For example, Windows XP requires at least 1GB of memory, while Vista needs 2GB; specialized computer graphics and full-motion video will require at least 4GB of memory, including what you'll need for your operating system. These system requirements are available on manufacturer websites or directly on the programs' packaging.

3.Consider all the programs, including your operating system, that you'll run at once and add together how much RAM each of these programs will need.

4.Add 512MB to 1GB extra RAM to your total to give yourself leeway for future programs that you might want to add to your computer.

Tips & Warnings
If how you use your computer changes and you add or remove programs, add or subtract RAM accordingly. Remember that RAM is set up in multiples of 8s. Memory is sold in increments of 256MB, 512MB, 1GB (1,024 MB), and 2GB (2,048 MB).

Laptop computers are not always easy to upgrade because some can only carry so much RAM, often 4GB. Most memory that you purchase aside from what comes with your computer will have a manufacturer's lifetime warranty. This is good only for manufacturer defects, so make sure you keep the receipt for memory in case you have to exchange it.
Continue Reading...
 
Copyright © 2011. Cksclw blog . All Rights Reserved
Game Downloads | Software Downloads | Appstore for Android | Phones Accessories | Hardware Komputer| Google Adsense | Site Map
Template Design by o-om.com. Powered by blogger